Blog Learning Center
LEGO® Lighting for Beginners
Lighting up your LEGO® set doesn’t have to be intimidating! Whether you’re a beginner or a pro, this guide will walk you through the process in a simple, fun way.
Now that you've chosen your Light My Bricks light kit and are ready to go, here’s where to begin. For this tutorial, we will install the LMB 2.0 Light Kit for LEGO Speed Champions 2 Fast 2 Furious Nissan Skyline GT-R (R34).
Step 1: Decide Your Lighting Method
Before starting your build, you'll have one or two lighting options.
Every Light My Bricks light kit comes with instructions to install lights after you’ve built your LEGO® set. Some kits also include a light-as-you-build option, letting you add lights while constructing your set.
Check your kit’s guide by scanning the QR code on the box to determine which method works best for you.


Step 2: Unbox & Get Ready
Now, let’s get started! Open your LEGO® set and the Light My Bricks kit. You’ll find that some bags may appear out of order or contain extra pieces. Don’t worry—that’s part of the fun! Be sure to check the manual to know which bags to open first.
Step 3: Start Building
Follow your instructions as usual. You’ll only need lighting components once the guide tells you—so take your time and enjoy the build.
This part is very similar to the LEGO® building guide, at the corner of the page you will see what you need.

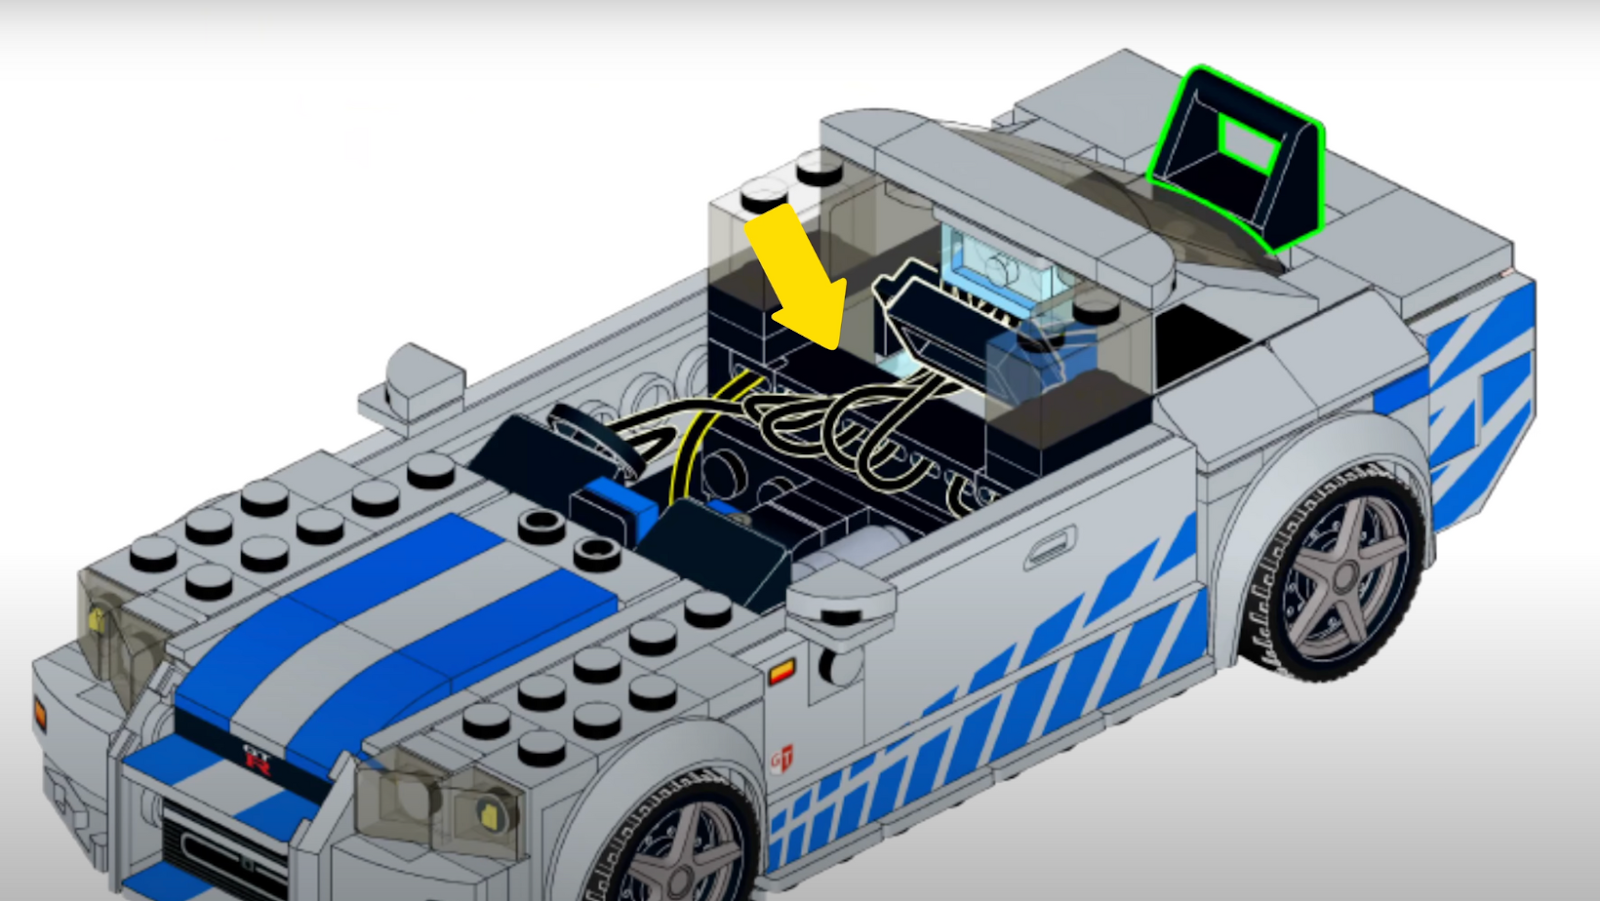
Any piece that needs to be connected will have a green outline in the guide.

If you’re adding lights after building, pieces that need to be removed will have a red outline.
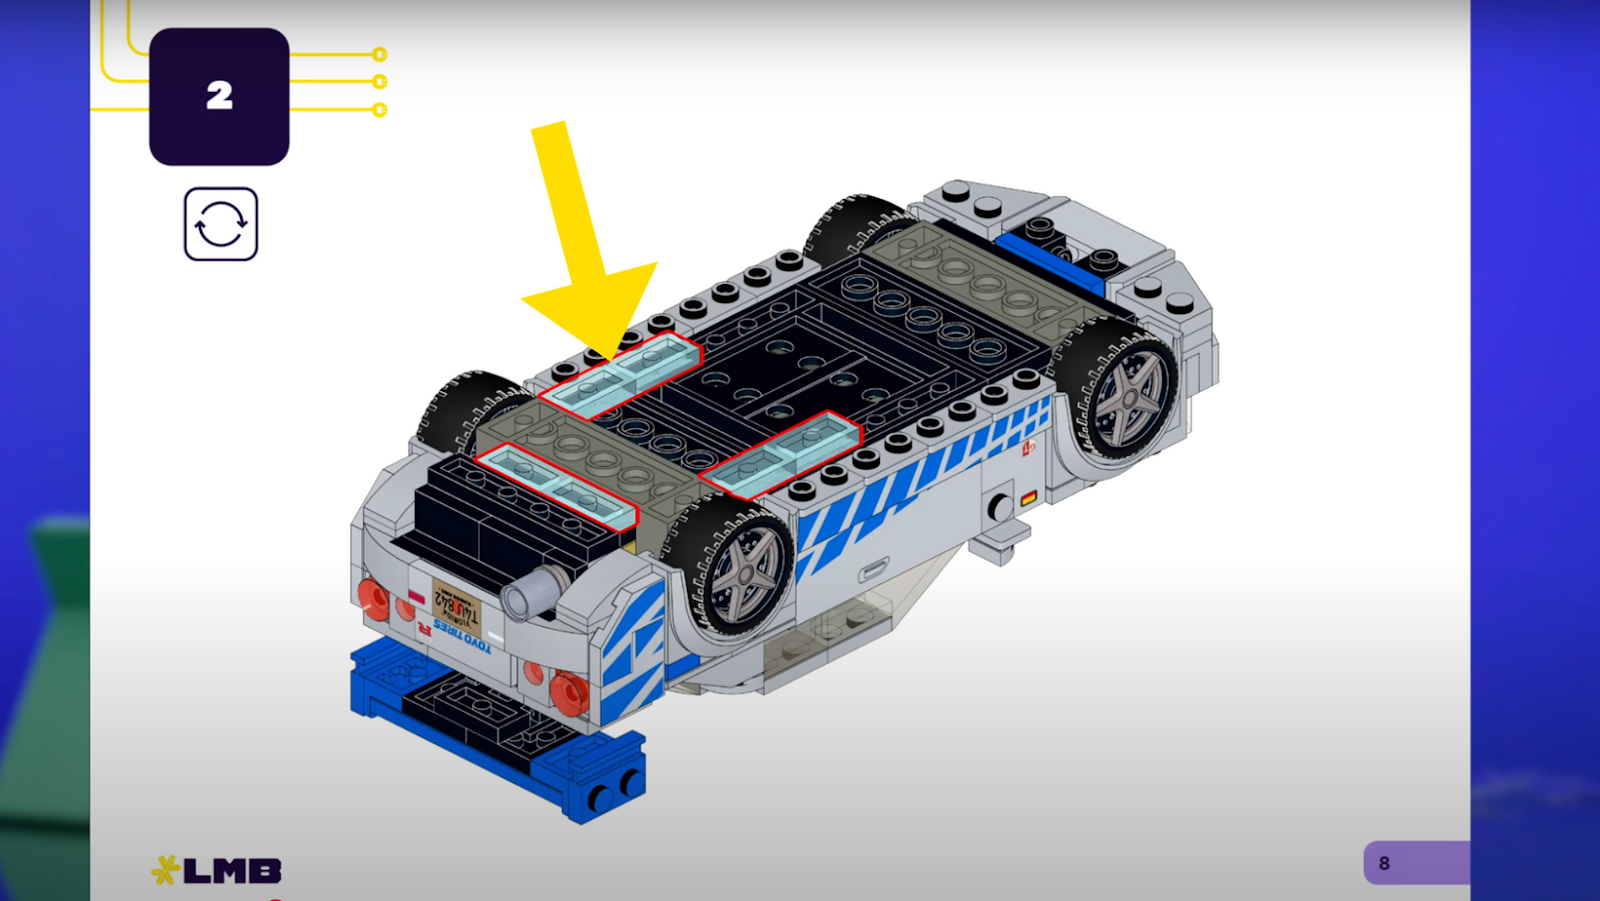
Step 4: Identify Lighting Components
When it’s time to install a light, look for the light purple box in the guide—it shows which Light My Bricks part you need. LEGO® parts will always appear in a dark purple box.

Each lighting component has a code (e.g., AR WW5), but don’t worry about memorising it—just match it with your kit’s parts.
Step 5: Installing Your First Light
-
Identify where the lighting component should go.
-
If required, you can gently bend the wire to form a 90° angle - this is usually used when lights are installed to headlines or under studs.
-
Hold the LED in place and secure it with the LEGO® piece.
-
Thanks to ultra-thin 2.0 wires, they fit between LEGO® studs seamlessly without causing gaps.

Step 6: Continue Lighting Installation
Some components attach to sub-models first before connecting to the main build. Keep an eye on the green outlines in the guide, as they show where pieces fit together.
If you’re prompted to open a bag before finishing the previous one—don’t worry, it’s intentional.
White outlines mean you’re done with that cable, while yellow outlines indicate you’ll still use it later.
Step 7: Managing Cables & Docks
Once your lights are in place:
-
Plug them into the dock (this example uses a 6-port dock).
-
Group cables neatly and secure them with a Light My Bricks Eclipse.
-
Follow the instruction guide to ensure proper placement.
Step 8: Final LEGO® Assembly
Complete the rest of your LEGO® build while ensuring cables stay aligned between studs. This keeps the model looking seamless and tidy!
Step 9: Powering Up
-
Connect the belt cable to the dock.
-
Plug in the Flux Converter, which supports both USB-A and USB-C.
-
Power it up and watch your LEGO® set come to life!
Light Up Your Build Today!
Lighting up your LEGO® set adds a whole new dimension to your display. Whether you're illuminating a skyline, vehicle, or modular building, Light My Bricks™ makes the process simple and enjoyable.
Explore our LEGO® Light Kits and DIY Lighting Components to find the perfect setup for your next build!


