Blog Learning Centre
Level Up Your Favourite LEGO® Build With Light My Bricks™ Vehicle Starter Pack
DIY LEGO® lighting is a fantastic addition to any LEGO® build if you've ever wanted to add more character and realism. The ultimate way to bring your favourite LEGO® vehicles to life is with our Light My Bricks™ Vehicle Starter Pack. This lighting kit can be used to create a stunningly detailed display for any LEGO® vehicle such as the LEGO® Creator Corvette, a LEGO® Technic off-roader, or a LEGO® Speed Champions street vehicle. Any LEGO® vehicle can be lit using our custom lighting for LEGO®.
So what’s the next step if you are wondering how to light up LEGO® vehicles with Light My Bricks™? You can learn how to use our pack to transform vehicles such as the LEGO® Dodge Charger, Land Rover Defender, and other models into fully illuminated, display-ready centrepieces with our easy-to-follow video tutorial. With the help of our high-quality LEGO® lighting kits for cars, your creations will not only look amazing but also glow with personality and realism.
Why the Light My Bricks™ Vehicle Starter Pack is so Unique
As huge LEGO® enthusiasts ourselves, at Light My Bricks™ we understand that lighting should complement your design rather than overpower it. That’s why we have developed a vehicle-specific lighting pack that is completely customisable, discrete, and simple to install.
The purpose of this LEGO® lighting kit is specifically to light up car builds. Its thin wiring components and compact LEDs won't interfere with the look of your build. No adhesive or permanent alterations needed!
Here’s why our community of builders love our LEGO® vehicle LED lights:
- Amazing compatibility: Designed for compatibility with all of the popular vehicle sets, including Creator Expert models, LEGO® Technic and LEGO® Speed Champions.
- All-in-one lighting solution: The pack includes all the key LEGO® lighting accessories you need, like docks, belts, tethers and more so you can be as creative as you like!
- Any age & any stage: Suitable for all LEGO® building skill levels with our step-by-step LEGO® lighting installation video tutorial.
- Fully customisable: Want more options for customising your ride? Browse our range of DIY components for more cool lighting options to add to your build!
Before & After Lighting with our Light My Bricks™ Vehicle Starter Pack
It’s lights, camera action when it comes to lighting up your LEGO® vehicle and take it from this:
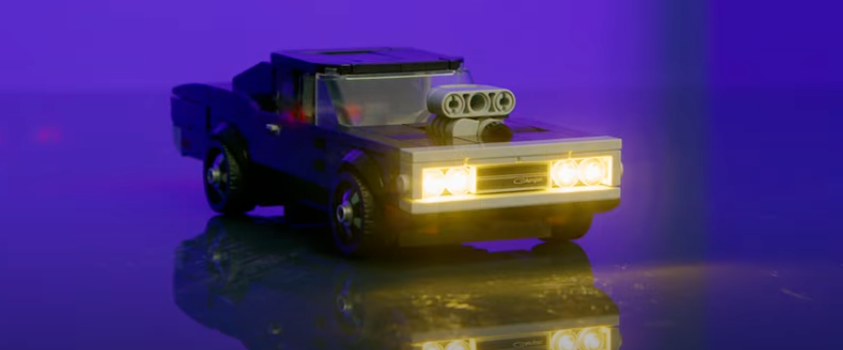
To this realistic masterpiece!
Whether it's the glow of warm headlights or the red brake lights, our LEGO® car lighting solutions turn your vehicles into illuminated works of art.
From the warm interior lighting in the LEGO® Land Rover to the powerful rear lights on a LEGO® Dodge Charger, this kit has everything to enhance your display. Our tutorial showcases how even beginner builders can add lights with ease and confidence using the Light My Bricks™ Vehicle Starter Pack.
What’s Included in the Light My Bricks™ Vehicle Starter Pack?
Inside the box, you’ll find everything needed to complete your lighting project with our Light My Bricks™ vehicle starter pack:
2x Large Warm White Astro Lights
2x Large Cool White Astro Lights – great for headlights or interior lighting
4x Regular Warm White Astro Lights
4x Regular Cool White Astro Lights
4x Regular Red Astro Lights – ideal for vehicle tail lights and brake lighting
3x Belts - to connect multiple docks together
2x Dock 6 – your central hubs for light connections
3x Tethers & 1x Eclipse Clip – for clean, and discreet cable management
1x Flux Converter - both USB-A and USB-C support for power input
Light up and power up your LEGO® car builds with our affordable LEGO® lighting solutions and the best LEGO® lighting kits for Technic models. Our starter pack has everything you need to get started and create your masterpiece!
Lighting Up the LEGO® Fast & Furious 1970 Dodge Charger with the Light My Bricks™ Vehicle Starter Pack
 A Step-by-Step Guide: Lighting Your Vehicle LEGO® Set
Step 1: Plan Your Lighting Design
Before you begin, think about where you want the lights to go. For the Fast & Furious 1970 Dodge Charger, we decided to light up the iconic taillights using the red Astro regular lights included in the Vehicle Starter Pack.
These lights fit perfectly beneath the red tiles on the back of the car.
Step 2: Remove LEGO® Pieces for Access
To get started, carefully remove the rear red tiles and a few bricks around them so you can access the area underneath.
This gives you space to place the LEDs exactly where you need them.
Step 3: Install the Rear Taillights
Take a Regular Red Astro Light and place it between the two studs where the red tile was.
Once it's in position, gently press the red tile back on top to hold the light in place.
Repeat the same process on the other side of the car.
Step 4: Choose a Spot for the Dock and Hide the Cables
Because this is a fairly small LEGO® set, space for hiding cables and mounting the dock is limited. But if you flip the car over, you’ll find some open space underneath the chassis.
That’s where we mounted the dock using the included tethers from the Starter Pack.
Step 5: Route the Cables Neatly
After attaching the dock, carefully reattach all the LEGO® pieces you removed earlier.
While doing this, route the cables neatly underneath the build so they reach the dock without poking out.
Tidy cable placement really helps keep your build clean and display-ready.
Step 6: Add the Headlights
For the front of the car, we added Regular Warm White Astro Lights in the headlights to give the model a realistic look.
You can also use Cool White Astro Lights if you prefer a different vibe for your vehicle.
Step 7: Light Up the Interior
Want to add some extra glow? Try placing an Astro light under the roof to gently light the interior of the car. It’s a great way to show off interior details.
Step 8: Use Large Astro Lights for Bigger Builds
If you're working with larger sets like Technic or Creator Expert vehicles, the large Astro lights included in the Starter Pack are perfect.
They’re brighter and ideal for highlighting larger design features.
Step 9: Power Up!!!
To bring your model to life, simply plug the setup into any USB wall adapter or power bank (5V or higher).
Note: Power adapters aren’t included in the starter pack but are available in the Power section on the Light My Bricks™ website.
Step 10: Show Off Your Light Up Creation
With everything lit up, your LEGO® Dodge Charger is now a centrepiece of your display!
Whether it’s for your shelf or part of a custom layout, Light My Bricks™ lighting brings a whole new level of detail and atmosphere to your build. Happy building and lighting!
Light My Bricks™ Top LEGO® Lighting Tips for a Tidy Install
As one of the best lighting for LEGO® sets, your LEGO® vehicle project comes to life with the Light My Bricks™ Vehicle Starter Pack.
Here are some useful tips and tricks for a neat, discreet, and polished result:
- Utilise Eclipse clips and tethers to keep your cables neatly in place
- Belts should be run through the spaces between studs for seamless integration
- To ensure that you know exactly where each light and cable will go, you should sketch out your lighting arrangement beforehand
With a little preparation and attention to detail, your LEGO® lights will be seamlessly and neatly integrated into the vehicle, giving you a polished, display-ready model that truly pops with light!
Light Your LEGO® Vehicle Collection (or any creation!) Your Way
With its versatility, the Light My Bricks™ Vehicle Starter Pack can illuminate any LEGO® vehicle build. Whether you're building a unique set or a modular city scene, you can start small and develop as your creations do. With our step-by-step user guide and LEGO® lighting video tutorial, installing the starter pack's lighting components is made simple and straightforward.
If you need any additional help or have questions about how to light up LEGO® sets? Check out our detailed Component Handling, Troubleshooting Guide, visit our website, or reach out to our friendly support team. Take your LEGO® build to the next level today!
